

Hey there, If you're a business owner or marketer looking for how you can create a Facebook ad account with just a few steps you are in the right place.
With over 2.9 billion monthly active users, Facebook is an amazing social media platform for reaching your target audience and driving sales or leads.
But here's the truth - you can't just jump into Facebook ads directly.
Nope, you need a solid plan from the start.
And step one? Setting up your own dedicated Facebook ad account.
Don't worry, I've got your back. In this guide, I'll guide you through the entire process in 5 simple steps.
So Let's dive in!
Step 1: Choose Your Account Type
The first decision to make is what type of Facebook ad account you need. There are two main options:
Personal Ad Account: This basic account is linked directly to your personal Facebook profile. It's quick and easy to create through the Ads Manager. The downside? It has some limitations on features and spending limits.
Business Ad Account: By creating a Business Manager account first, you open the ability to run ads through a dedicated Business ad account. A business ad account gives you way more flexibility in marketing tools and higher spending limits.
For most businesses and serious advertisers, I'd recommend going to the Business ad account. It takes a bit of extra work, but it'll be worth at the end.
Step 2: Set Up Business Manager
If you choose a Business ad account, you'll first need to create your Business Manager. This simple interface is where you'll see your all Facebook business assets like ad accounts, pages, pixels, and more.
- Head to business.facebook.com and click "Create Account"
- Enter your business details like name, address, and email
- Add team members and assign roles for who can access what
- Secure your account by enabling two-factor authentication
Take your time with this step, as setting up the Business Manager properly will make the rest of the process much smoother.
Step 3: Create Your Ad Account

With Business Manager ready to roll, you can now add your advertising account:
- Go to the Business Settings section
- Click on "Accounts" and choose "Ad Accounts"
- Select "Add" and pick "Create a New Ad Account"
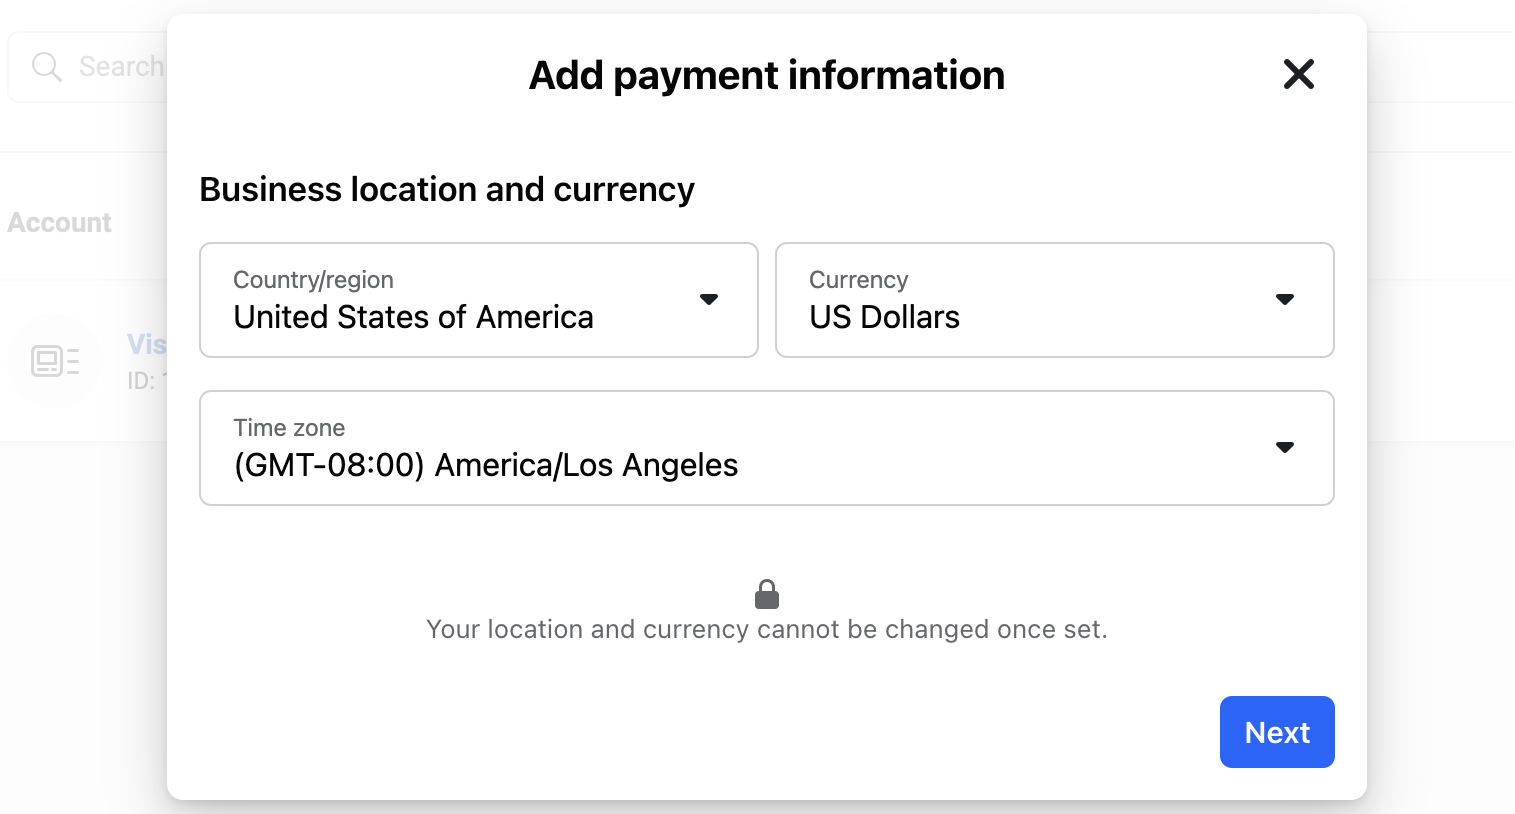
- Fill out your ad account details like currency and time zone
- Assign ad account roles to your team members
Boom! Your brand new ad account is created and linked to your Business Manager. You're making moves, my friend!
Step 4: Set Up Payment Method
Before you can run Facebook ads, you'll need to add a payment source to cover those ad expenses. Facebook accepts all major credit/debit cards, PayPal, or you can fund the account directly from your bank.
In your Business Manager:
- Go to Settings > Billing
- Click on "Add Payment Method"
- Enter your credit card or PayPal info
- Choose a monthly payment threshold amount
While a payment method is required upfront, Facebook won't charge you until your ad spend crosses that set payment threshold. Pro tip: I'd recommend adding at least two valid payment sources to avoid any potential snags.
Step 5: Assign Ad Account Access
The last crucial step is granting appropriate ad account access to the right team members. This allows others to create campaigns, adjust budgets, pull reports, and more.

In Business Manager:
- Go to the Ad Accounts section
- Click on your ad account name
- Select "Ad Account Roles"
- Assign specific levels of access like Admin, Advertiser, etc.
Be smart about who you grant full "Admin" permissions to. You can always adjust these roles down the road as needed. After this step, your ad account is 100% ready to rock!
Bonus Tip: Link Your Facebook Business Page
One last pro tip - don't forget to claim and link your official Facebook Business Page to your new ad account! This allows you to run ads directly from that Page.
- From your Business Manager, go to Business Settings
- Click on Accounts > Pages
- Add and assign your business Page
And there you have it, folks! While the setup process has a few steps, I just walked you through exactly how to create a legit Facebook ad account from scratch.
Follow these 5 steps, and you'll have an optimized account in no time.
Now for the fun part - actually creating and running successful Facebook ad campaigns! But we'll save that topic for another day.
For now, this is enough you need to know enjoy the guide and create your ad account now.
Final Words
So this is all about how you can create a Facebook business ad account by following a few steps. So do you have any other questions?
Never hesitate to reach out! Ecomparkour is always here to be your friendly Facebook ads guide. With the right strategy and dedication, you can easily crack the Facebook ads!


.svg)
.svg)
.svg)
.svg)


