How do I Turn on The Facebook Business Verification Button?

  • 4 min read
  • By Jason Loyed
  • April 1, 2024

Welcome to our latest blog post, where we're about to unfold a neat trick that could be a game-changer for many of you managing Facebook Business accounts

Today, we're solving a common hurdle: enabling the hidden "start your verification" button for your Facebook Business Manager. This process can seem difficult, especially if you're working with a new business manager or an existing one where the option seems to be missing. 

Fear not, as we're here to guide you through every step of the way.

Before we dive into the details, we invite you to join our community on Discord and Telegram. We're constantly sharing tips, tricks, and valuable resources that you wouldn't want to miss.

what is Facebook Business Verification

Facebook Business Verification is a process by which Facebook confirms that a Facebook Page or account represents a legitimate business or organization. It helps to build trust and credibility for that business on the Facebook platform.

Some key points about Facebook Business Verification:

  1. It adds a gray verified badge next to the Page's name, similar to the blue verified badges for celebrities and public figures.
  2. To get verified, a business has to be operational and have a publicly listed phone number, email, website and physical address associated with the business.
  3. The verification process involves submitting documents that prove the business is legitimate, such as a phone bill, utility bill, business license or tax documents.
  4. Verified Pages get some added credibility and distribution advantages from Facebook, such as showing up higher in some search results.
  5. It helps prevent fraud and impersonation by validating that the Page legitimately represents the real-world business.
  6. Both larger brands/companies and small local businesses can apply for verification.

So in summary, it's a way for real businesses to authenticate their official presence on Facebook and stand out from potential impersonators or unverified Pages. Having that verified badge signals trustworthiness to potential customers.

Step 1: Access Your Business Manager

Begin by opening your web browser and navigating to https://business.facebook.com/select. This page will prompt you to select your business manager. It's important to note that this step is necessary only if you manage multiple business managers. If that's not the case for you, head directly to https://business.facebook.com/settings instead.

Step 2: Navigate to the Meta Business Home

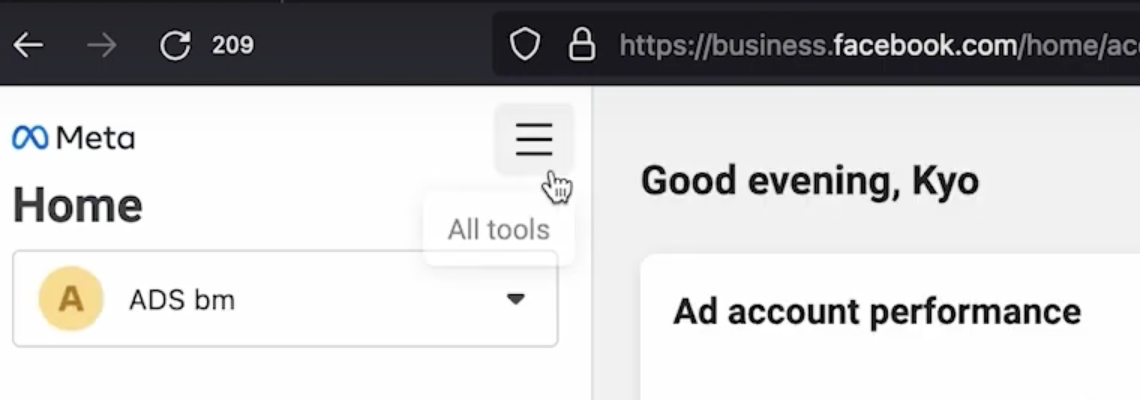
Once you select your business manager, you'll be redirected to the Meta Business Home. Look for the three horizontal lines at the top of the page, click on them, and select "Business Settings."
Step 3: The Security Center

Within Business Settings, scroll down until you find the "Security Center." Here, you might encounter a message stating "ineligible for verification," or you might not see any verification option at all. This is where the magic begins.

Step 4: Adding an App

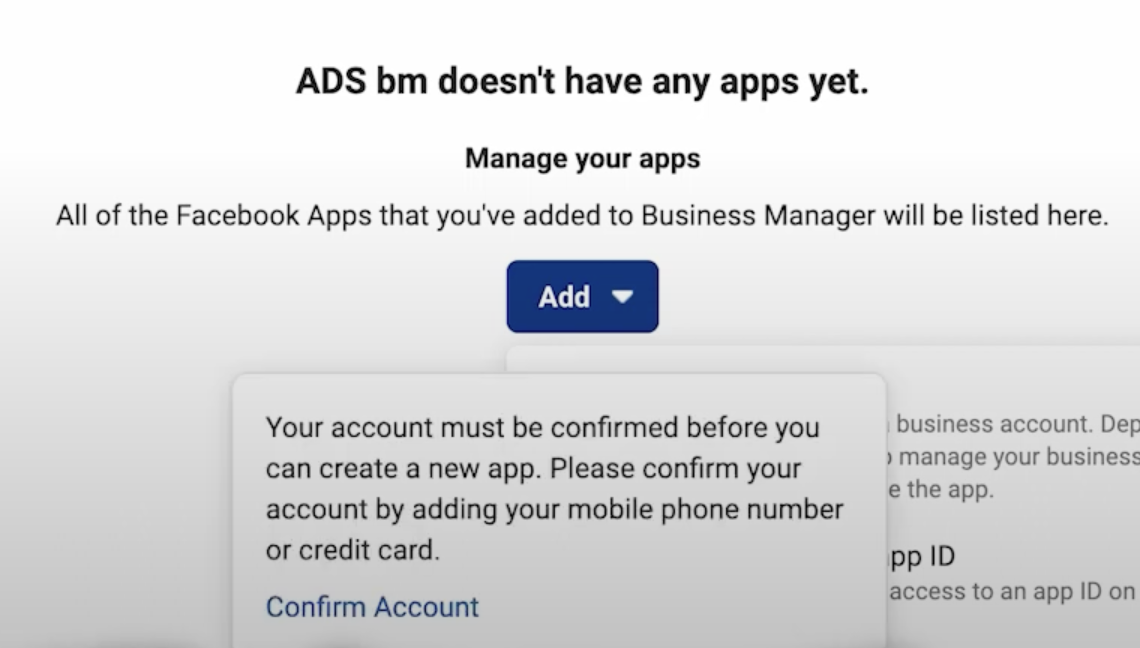
In the left-hand menu, click on "Accounts" and then select "Apps." Here, you'll see an option to "Add." Click on it. Next, hover over the small lock icon and choose "Confirm account."
Step 5: Verification Process

The system will now prompt you to verify your phone number. Select your country, enter your phone number, and wait for the Time Password (OTP) to arrive. Once you receive it, confirm your number. Following this, you'll be asked to verify your email address. Check the appropriate box, click on "Confirm email," and complete the necessary steps for email verification. 

Finally, select "Owner and Founder" and click on "Complete Registration."

Step 6: Creating Your App

After completing the registration, you'll see a "Create App" button. Click on it, select "Other," and then click "Next." Choose "Business" as the category and click "Next" again. You'll be asked to provide a name for your app. After naming your app, click "Create," enter your password when prompted, and submit.

Step 7: Starting the Verification

Post-creation, you'll be directed to the Facebook Developer page. From there, navigate to "App Settings" in the left menu, click on "Basic," and scroll down to the "Verification" subsection.

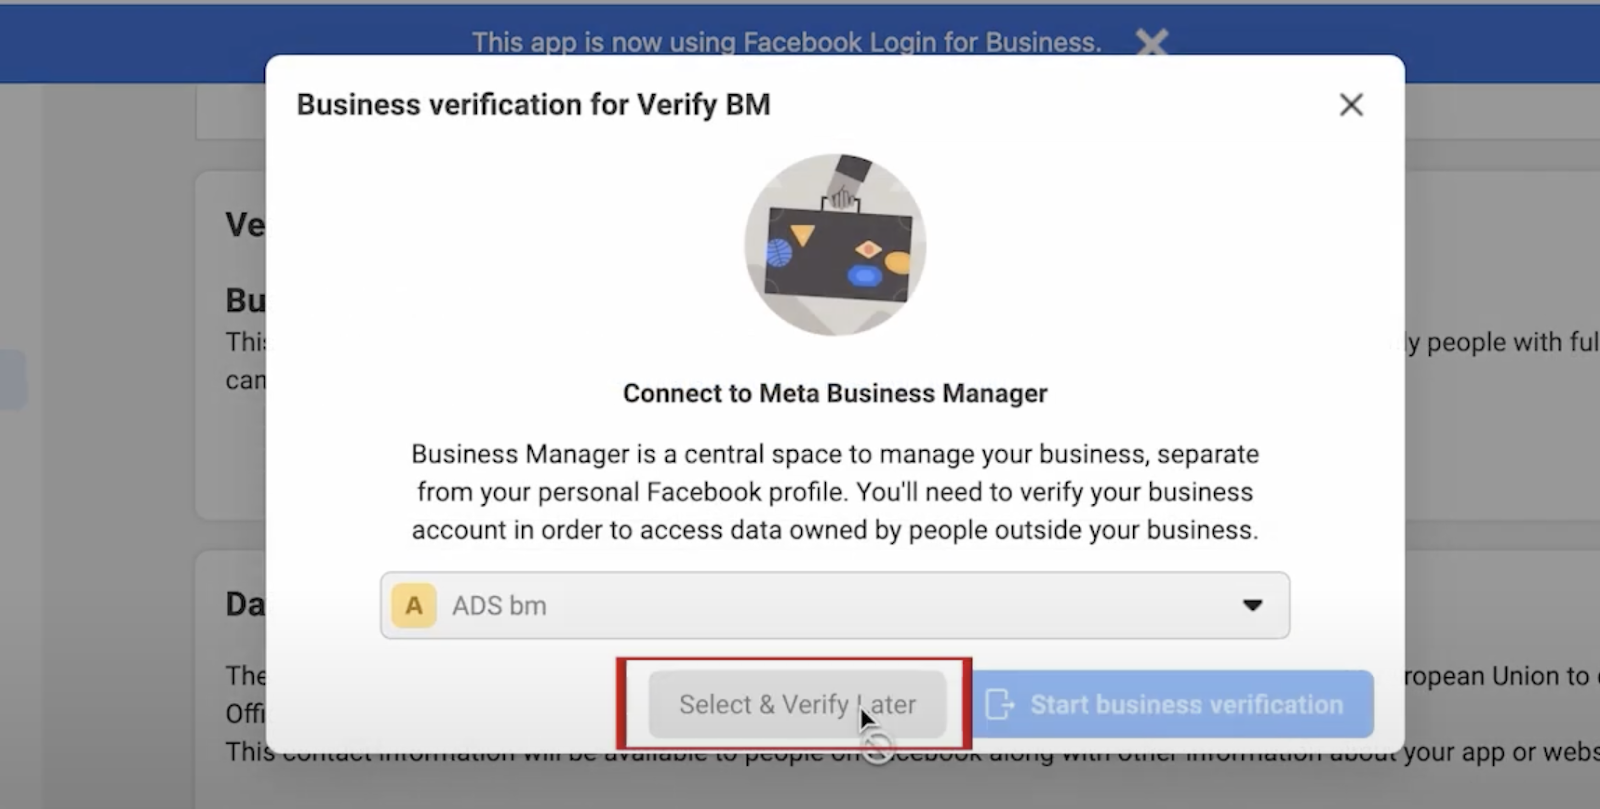
Here, you'll find the "Start Verification" button. Clicking on this will allow you to choose your business manager. Select it, click "Select and Verify Later," and after a brief refresh, click "Start Verification" again.
Congratulations! You've now unlocked the "Start Verification" button on your Business Manager. The final step is to upload the necessary documents to complete your verification on Facebook.

We hope this guide proves to be immensely helpful for you. Don't forget to join us on Discord, Telegram, and our other channels for more insights and updates. Happy verifying!

Conclusion

And that's a wrap! With just a few simple steps, you can now access the hidden verification button for your Facebook Business Manager. By adding an app and initiating the verification process, the button will unlock, allowing you to submit documents and complete verification.

This guide aims to make the process smooth and frustration-free. We hope you found these steps helpful. Don't forget to connect with us on social media for more tips and tricks on optimizing your Facebook business presence. Thanks for reading!

Jason Loyed
Co Founder of Ecomparkour
As a Paid Media & Web Analytics Specialist, I accelerate e-commerce brand growth by leveraging paid media, data tracking, and web analysis to optimise digital strategies.
Table Of Content
By Jason Loyed
4 min read

Keep Learning

Aug-23-2022

Join our beautiful community of facebook marketers

Zumba is an effective exercise that burns 600 to 1,000 calories daily. Your fitness and health goals will determine ....
Read
Aug-23-2022

Join our beautiful community of facebook marketers

Zumba is an effective exercise that burns 600 to 1,000 calories daily. Your fitness and health goals will determine ....
Read
Aug-23-2022

Join our beautiful community of facebook marketers

Zumba is an effective exercise that burns 600 to 1,000 calories daily. Your fitness and health goals will determine ....
Read

How do I Turn on The Facebook Business Verification Button?

FACEBOOK
  • April 1, 2024

Welcome to our latest blog post, where we're about to unfold a neat trick that could be a game-changer for many of you managing Facebook Business accounts

Today, we're solving a common hurdle: enabling the hidden "start your verification" button for your Facebook Business Manager. This process can seem difficult, especially if you're working with a new business manager or an existing one where the option seems to be missing. 

Fear not, as we're here to guide you through every step of the way.

Before we dive into the details, we invite you to join our community on Discord and Telegram. We're constantly sharing tips, tricks, and valuable resources that you wouldn't want to miss.

what is Facebook Business Verification

Facebook Business Verification is a process by which Facebook confirms that a Facebook Page or account represents a legitimate business or organization. It helps to build trust and credibility for that business on the Facebook platform.

Some key points about Facebook Business Verification:

  1. It adds a gray verified badge next to the Page's name, similar to the blue verified badges for celebrities and public figures.
  2. To get verified, a business has to be operational and have a publicly listed phone number, email, website and physical address associated with the business.
  3. The verification process involves submitting documents that prove the business is legitimate, such as a phone bill, utility bill, business license or tax documents.
  4. Verified Pages get some added credibility and distribution advantages from Facebook, such as showing up higher in some search results.
  5. It helps prevent fraud and impersonation by validating that the Page legitimately represents the real-world business.
  6. Both larger brands/companies and small local businesses can apply for verification.

So in summary, it's a way for real businesses to authenticate their official presence on Facebook and stand out from potential impersonators or unverified Pages. Having that verified badge signals trustworthiness to potential customers.

Step 1: Access Your Business Manager

Begin by opening your web browser and navigating to https://business.facebook.com/select. This page will prompt you to select your business manager. It's important to note that this step is necessary only if you manage multiple business managers. If that's not the case for you, head directly to https://business.facebook.com/settings instead.

Step 2: Navigate to the Meta Business Home

Once you select your business manager, you'll be redirected to the Meta Business Home. Look for the three horizontal lines at the top of the page, click on them, and select "Business Settings."

Step 3: The Security Center

Within Business Settings, scroll down until you find the "Security Center." Here, you might encounter a message stating "ineligible for verification," or you might not see any verification option at all. This is where the magic begins.

Step 4: Adding an App

In the left-hand menu, click on "Accounts" and then select "Apps." Here, you'll see an option to "Add." Click on it. Next, hover over the small lock icon and choose "Confirm account."

Step 5: Verification Process

The system will now prompt you to verify your phone number. Select your country, enter your phone number, and wait for the Time Password (OTP) to arrive. Once you receive it, confirm your number. Following this, you'll be asked to verify your email address. Check the appropriate box, click on "Confirm email," and complete the necessary steps for email verification. 

Finally, select "Owner and Founder" and click on "Complete Registration."

Step 6: Creating Your App

After completing the registration, you'll see a "Create App" button. Click on it, select "Other," and then click "Next." Choose "Business" as the category and click "Next" again. You'll be asked to provide a name for your app. After naming your app, click "Create," enter your password when prompted, and submit.

Step 7: Starting the Verification

Post-creation, you'll be directed to the Facebook Developer page. From there, navigate to "App Settings" in the left menu, click on "Basic," and scroll down to the "Verification" subsection.

Here, you'll find the "Start Verification" button. Clicking on this will allow you to choose your business manager. Select it, click "Select and Verify Later," and after a brief refresh, click "Start Verification" again.

Congratulations! You've now unlocked the "Start Verification" button on your Business Manager. The final step is to upload the necessary documents to complete your verification on Facebook.

We hope this guide proves to be immensely helpful for you. Don't forget to join us on Discord, Telegram, and our other channels for more insights and updates. Happy verifying!

Conclusion

And that's a wrap! With just a few simple steps, you can now access the hidden verification button for your Facebook Business Manager. By adding an app and initiating the verification process, the button will unlock, allowing you to submit documents and complete verification.

This guide aims to make the process smooth and frustration-free. We hope you found these steps helpful. Don't forget to connect with us on social media for more tips and tricks on optimizing your Facebook business presence. Thanks for reading!

ecomparkour
We are your trusted marketing partner, specializing in helping you buy Facebook accounts, and dedicated to unlocking your business's full potential.
Phone: +852 5362 7682
Email: hongkong@ecomparkour.com

Room 21, 4/F., Beverley Commercial Center87-105 Chatham Road SouthTsim Sha Tsui, Kowloon HONG KONG
X (Twitter) LogoInstagram LogoYoutube LogoTelegram LogoWhatsApp Logo